Outbuilding Organization Progress

I worked all morning and then sent the client what I had for review (non-transcription project). I vegged out for a couple of hours since I had nothing else to do until the comments came in and I was bone tired. It was not nice out anyway. I did go out around 1:00 to see if I had mail (no).

Mid-afternoon, it was getting very warm in the RV since I have the dehumidifier running to dry out the under sink area and I was getting antsy, so I decided to go do some work on the sheds.

I started by demolishing the grain chute in the cabin, something I wish I had done last year, since it was very messy! I was surprised by how much bigger the cabin felt after!

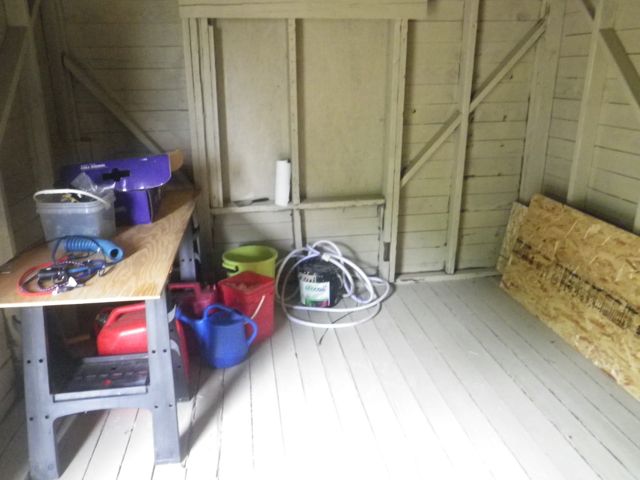
After that, I just focused on that half of the cabin, moving things to the shed and garbage pile as needed. I set up a pallet in the corner and stacked storage bins on it, then set up the table between the pallet and the washing machine.

The storage needs for the shed are becoming clear as I start to move ‘stuff’ into it.

The big stuff that has to go in and out needs to be parked at the front by the door, not at the back like this. I need overhead storage for wood.

IMGP2152

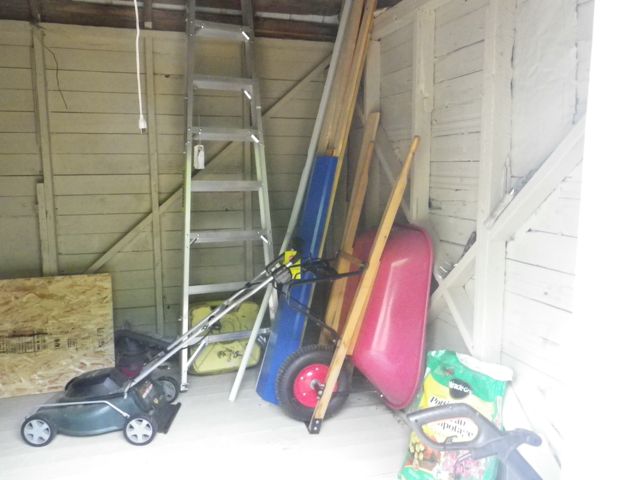
I really need a proper workbench and, in fact, I found a design for something that I can easily and cheaply build myself. It will go in the corner where the wood is right now. The wall where I set up the board and sawhorses will have a window, so I’m thinking low shelves on the bottom for storing bits and bobs or even a low dresser or cabinet. I’ll keep my eye open at the thrift stores.

IMGP2153

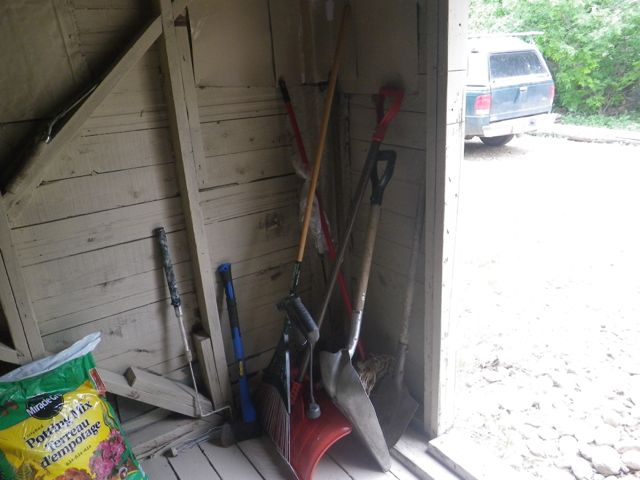
Garden tools can fill the north wall (where the wheelbarrow is presently) with hooks or some other system to hang them.

IMGP2154

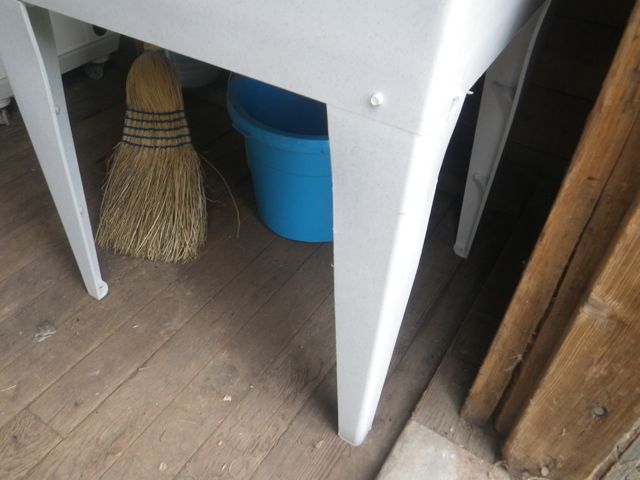
As for the cabin, the east side is a complete disaster, but I’ve carved out a really nice little laundry area on the west side. I haven’t decided yet where I’m putting the dryer, probably on the east side since I don’t use it much.

IMGP2158

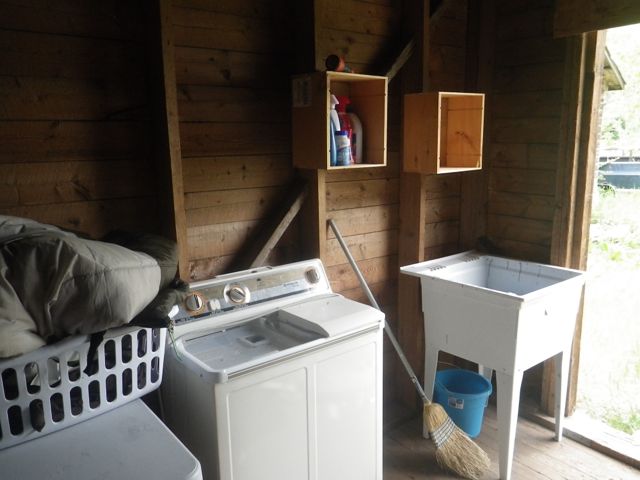
I screwed a couple of wine crates to the studs for instant storage.

IMGP2159

A bucket under the sink will catch water until I find a hose that I could run outside.

IMGP2160

I intend for the cabin to be an extension of my home until it is converted into a home. So I want to use it for domestic stuff only, not dirty things. I would really like to get some exercise equipment, especially a treadmill and a bench press, in it. It also needs a light source, but the shed light fixture wouldn’t be enough for this space

While I didn’t care much for living in RV parks, I did miss having other spaces I could retreat to, be they a laundry room, a gym, or a place to spread out a craft project. That’s what I’m getting here at Haven. Some people will scratch their heads and wonder why I don’t get a big house instead. I dunno. I just like this better. 🙂

Scalding Hot Water

Since I have no intention of going to town this week, I wanted to come up with a temporary fix to isolate the hot water from the cold to not only get me through the week, but also confirm that my planned fix would work. My temporary fix was very simple: I just took some self sealing tape and put it over the open ends of the pipes and then reinstalled the hose.

This worked like a charm! So now, I know I can get some PVC caps and glue and permanently seal the two pipe ends. This will be pretty much non-reversible, but it will be a permanent fix that I’ll never again have to worry about.

My water heater is behaving well, so it’s really lovely to be able to leave the pump on all day and have hot water at the flick of a tap. I haven’t had that luxury in a long time except for my stays in the U.S. in May, of course. In Mexico, I got just warmish water in the kitchen and bathroom after running the tap a while, although I couldn’t complain about the water temperature in the shower! I had complete control over the heat setting on the water heater and was paying for propane, but to get hot water in the kitchen meant dangerously hot water in the shower, so it was a bit of a compromise.

I was asked why I live off my holding tank rather than being hooked up to city water. Good question!

Water in the hamlet is gravity fed from a stream uphill. The hydrant I tap into is nearly at the end of the water distribution line. There is therefore very little water pressure right at the hydrant. Then, I have to run about 300′ of garden hose from the hydrant to my RV. End result, no water pressure to speak of. I get a trickle out of the kitchen and bathroom sink taps and just drips in the shower, not even a steady stream.

Most of my neighbours have some sort of accumulator and/or pump system to improve their water pressure. This is something I will investigate when I get water in on site. So for now, filling the holding tank each day and running the water pump is my best option. I have tons of pressure that way and so my showers are much more enjoyable. I leave my hose hooked up, so once a day, I go turn on the hydrant, set a timer for 40 minutes, and when the time is up, go turn it off again. It’s really not a huge deal.

Another reason I prefer to use the holding tank is that it gives me an immediate means of turning off the water in the case of a leak. I had a bit of a hard time getting the hose back on the pipe over the tape yesterday and one of the connections blew off about a half dozen times over the course of the day before I finally got it good and tight. Had I been on city water, I would have had to run out side and down the block to turn off the water (as that would have been faster than trying to unscrew a hose to disconnect it!).

Now that the plumbing situation is under control, it’s time to focus on work. It’s going to be a grey day and so perfect for that. I am quite tired after the busy last few days, so it’s going to be nice to sit here with a pot of coffee and just tap away.

No Hot Water

I haven’t had any hot water mentioning since I ‘fixed’ the bypass last night. It was as if I had a tap open somewhere and the cold and hot were mixing. The obvious cause of the problem came to me as I went to bed, but I was not going to test my theory when I was ready to pass out from exhaustion.

This morning, I reexamined the valve that I had cut out and my suspicion was pretty much confirmed, but I still wanted one more piece of evidence. I really wished that I had a water bypass installation diagram to confirm it before I took anything apart. Guess what I found way at the back of my water heater cabinet, located in such a way that I was only able to read it by shoving my camera down the side of the cabinet and blindly snapping pictures until I got a clear one? I really want to have Words with the guy who installed my water heater!

IMGP2151

All right. You’ve had a moment to study the diagram and you can see my problem, right?

The bypass valve I cut out had to be closed for me to have hot water. The tube I installed is open. So I need to remove the tube and find a way to cap the two ends. Copper caps are obviously not going to work here because of the grey conduit over top. So it looks like I need some sort of plastic or rubber cap with plumbing glue. I have the valve I cut off with some of the grey conduit sticking out, so I can bring that to all the different home stores until I find something suitable. But I’m really not due to go back to town any time soon, so it’s no hot water for me for a bit. 🙁

I did have the thought that I could somehow clamp the hose as a temporary fix, but it is very rigid, so I don’t think that’s going to work. I am going to pull out some clamps later and try this anyway.

Not Quite Enough Paint

Between work spurts, I finished up the painting in the shed this afternoon. Unfortunately, there wasn’t enough paint to do the peaks and ceiling, as well as a few spots on the walls. But finishing the job isn’t worth $40 me since the objective of the exercise has been accomplished: being able to walk in there without immediately feeling like I need a shower!

It looks so bright in clean inside now!

IMGP2145

IMGP2146

IMGP2147

IMGP2148

The wall to the right of the door (looking outside) is going to have a window, so I didn’t put too much effort into getting all the bare spots covered, saving the paint for the walls that are going to be more visible.

Now, I can start using the building! I’m not sure yet what I’m going to put in for storage. I will start by corralling everything I want to put into the shed and that will help me determine what I need. I’m trolling the classifieds for something that I will be able to use as a workbench and for tool storage.

Next little project will be to build a ramp into the shed so that I can more easily take out the lawnmower. I think I will be able to recycle pallets for that use!

Bypass Valve Good Enough Fix

I woke up to quite a lot of water in the bucket below my bypass valve, so the tape really didn’t work (I knew it was a very long shot!). There is literally no water pressure if I hook up to city water, so I’m always living off the holding tank, which I turn off at night. So the valve leaking this badly with the system not being pressurized really lit a fire under my butt to get this fixed somehow, even if it wasn’t going to be elegant, because obviously the leak was getting worse.

Way back yonder, I used to own a very old mobile house. It was so old that none of its plumbing parts fit existing parts. Minor fixes would involve tearing out large sections and starting from scratch. It was really good plumbing education and I learned a lot about various fixes, some not so orthodox, and what can hold out over time. I got a lot of experience soldering copper pipes, too, and am very good at it! The mobile home park owner would often have me do repair jobs for it and deduct the time I spent from my monthly pad rent!

Miranda’s plumbing is in some respects much easier to deal with. She is plumbed with entirely household materials, not RV-specific parts. But all of her plumbing is squeezed into tight spots and obviously not intended for repair. Because the valve was installed backwards, there was no way it could be fixed. So it had to come out.

I have a little copper pipe cutter, but there was no room for it to swing the full 360 degrees it needs to. It was tricky cut because the whole area was put together so tightly. There was a brass connector on both sides of the valve that I needed to avoid, the copper pipe was covered with a soft grey plastic conduit, over that was a welded steel clamp, and I had to leave myself something with which to join my replacement material.

I estimated where the brass connectors ended and used a steak knife to cut through the soft grey conduit. Thankfully, there was no copper on the side of the valve closest to the wall and the knife sliced through the conduit like it was butter! Even though the water system wasn’t pressurized and I’d bled the line, I still got sprayed. What a mess!

The other side was trickier because there was copper under the plastic conduit. I painstakingly sawed at it with a for-metal jigsaw blade held with pliers, which took me almost an hour with only a short break. Thankfully, it was very small diameter pipe and I didn’t have much to get through!

So now, the valve was out, but I needed to close out my system or be without water. I had decided before bringing myself to the point of no return to use a piece of hose with a couple of clamps. I needed a hose with a diameter big enough to fit over piece of garden hose. I went out to my MacGyver pile, rummaged around, and found a length of hose that looked perfect — rubber, thick, reasonably flexible, and with the right diameter. I found clamps in my plumbing parts bin. Unfortunately, there wasn’t enough pipe onto which I could fit the hose to double clamp.

It took a bit of effort and bleeding (but no swearing, surprisingly enough) to get the hose positioned in such a way that the clamps could form the necessary seal. I turned the pump on about four times and got sprayed as many times before the leaks stopped.

IMGP2143

Cautiously optimistic, I left the pump on and dragged out the dehumidfier.

It’s been eight hours and the repair has held. Will it keep doing so? Only time will tell. I do know that I’ll need to tighten my clamps every so often and that the system not being constantly under pressure will work in my favour.